Having been impacted by security issues in the past, I am always on the lookout for new and hopefully better network security products. For a while now I have hearing about the Sophos UTM and was intrigued by what it packed in for standard features. Recently they released a new product called the Sophos XG Firewall which promises to make security a bit easier, and hopefully more secure than many other solutions. Included is antivirus, web filtering, application blocking, and a rule based firewall that should be enough for most users once you get past the learning curve. You can argue there are better products out there, even their old version, however in comparison to off the shelf routers and other products in this category, this is a much better way to go and its free for home users with no IP restrictions.
To set the stage, I had been running Untangle and paying for their subscription service for two of their apps (Antivirus, and Application blocker) at a cost of $54/month. Given that this license is limited to 10 IP addresses, this is a significant amount of money to pay for security. Based on what happened in the past I felt I needed the extra security however if I could find a product that gave me comparable results without the cost I would certainly be all in. After seeing what Sophos XG Firewall had to offer, I thought it would be worth a shot based on features and capabilities. As there is a learning curve with this and similar products, I tried to capture the process I went through from the beginning of my journey in hopes that it will help some of you get there a bit faster than I did. This is in no way the only way to do this, but this is the way that worked for me.
Preparation and Planning Prior to Installation
In my way of doing things, I find it worthwhile to plan things out as well as prepare by doing some homework first before starting a project. Unless you are the only one using the internet, you have to be prepared to get things running to avoid downtime for the family. In addition, because I live in a mountain area, we rely on Cell Repeaters that are connected to the router. Bringing down the internet also brings down all the cell phones. I listed a few of things I did in advance to minimize potential down time and to be a bit more prepared.
- Basic network layout (understanding what you want and a rough sketch of the configuration. Does not have to be fancy but it helps thinking it through).
- Determine how many NICs you will use so you can plan your network. Two is the minimum and all that is required in most cases. You may want a third or fourth for a separate network, DMZ, wireless network, or any other purpose. You can add as many cards as you need depending on complexity.
- List the items you will need a “static IP address” to start with. My suggestion is to keep to a minimum but understand that it does make it easier to apply station level filters and controls later on. You do not have to start with any as they can be added later but you should have a concept in your mind. PC/Server that you do not want the IP to change such as a NAS, media server, Home Automation controller is typically a must. (See tips below on speeding up the Static IP entry)
- Try and list any special needs for any of the devices such as port forwarding (for cameras, Home Automation Controllers, or Media Servers), restrictions, extra filtering, bandwidth control or any other goals of the project. Devices that require anything special should at some point also have a fixed IP before creating any rule.
- An of course the obvious which is to build your box and install the software “before” you disconnect your existing router again to avoid downtime.
Installation (Software Install Instructions)
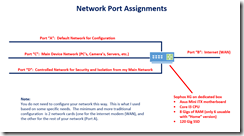
- Once you have your box ready and the software installed, attach your cable modem to Port #2. This is typically the second port in the chain and usually starts with the internal NIC card unless you have disabled it in your BIOS.
- To configure your router, you have to attach your computer to Port #A, either by using your existing switch or a cross-over cable directly from you laptop. If you are using your internal network adapter, it will become in most cases Port A automatically. If you plan on only using your Intel multi-port adapter such as I did, your internal adapter will still be your default port A unless you turn it off in the BIOS first. I had to play with this awhile before figuring this out and ended up disabling the internal card and only used my plug in card. You are now ready to log on to the admin screen using the default https://172.16.16.16:4444 to start your configuration. This sounds like allot of steps and it may take you a bit the first time you do it. I have done a few times and it really only took me about 10-15 minutes including the installation once I better understood the process. I scratched and erased a couple of times from testing sop I got good at it.
Configuration
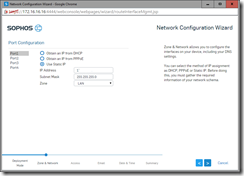
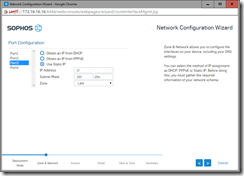
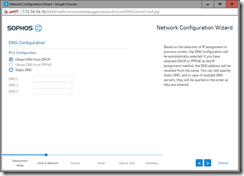
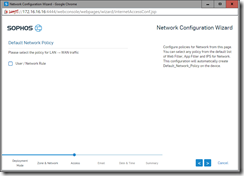
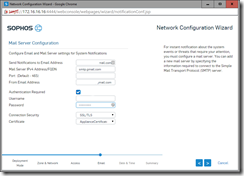
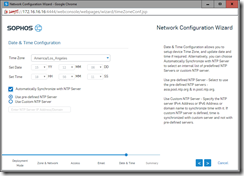
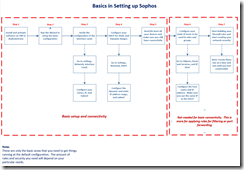
Once you log in, run the Network Wizard if you have not already done so during the install as it does much of the initial work for you. In a basic case, just running the wizard will get you connected if you have everything connected correctly. Keep in mind that even if you are connected, you still have rules to create and things to configure to get the most out of it.
Once you are connected, you are now ready to fine tune the configuration and get things the way you want. This can be done a variety of ways but this is what I did.
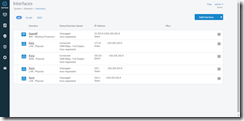
- Configure/Review the Network Interface cards (System > Network > Interfaces) and make sure it is what you want. If you changed your mind or made a mistake in the wizard, you can fix much of it here. This is where you would reassign ports if you do not like the default configuration.
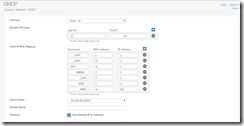
- Next configure the DHCP (System > Network > DHCP) and setup for your main network. Set the range of IP addresses that you want the DHCP to issue. Remember to reserve some space for static IP and a range for dynamic. XG will not let you assigning a static IP in the DHCP range. Also note that XG only acts as a router until you configure some web/application filtering/scanning which is where the real power of XG is exploited.
- Once you get everything in your configuration completed, reboot all the systems and check that it worked the way you wanted.
Shortcut to entering Static IP addresses
- Quick way to input Static IP addresses
- Boot all your systems and go to the DHCP section (System>Network>DHCP). Wait for the IP4 Lease section to populate and use the top row to sort the list any way you want. Highlight the entrie list and copy and paste it to Excel.
- Now go to the DHCP secton and when configuring your static IP address, copy and paste the MAC address from the excel sheet to the input screen in Sophos. This will help to input static IP address very quickly as it requires the MAC address. Doing this way will avoid having to type each MAC address which is very time consuming. Doing it this way I was able to do about 20 static IP’s in less than 15 minutes.
- Once you have completed and rebooted all the devices, export the list again for documentation and future reference when you create future rules.
Important Note: Remember to frequently run the backup the setting from the (System>Administration>Backup/Restore). This is especially important as you make changes and experiment with different settings as it gives you the opportunity to roll back in the event you make a mistake. I used the automatic backup via email as I do not like to use FTP and have it backup once a day. Once I get things the way I want and I have finished experimenting, I will switch to weekly or monthly. The attachment file is less than 400K.
Rules Concept
On the surface the rule model is pretty straightforward, however in practice it may require a bit more trial and error. Though it is pretty easy, the behavior is not always what you expect. The premise of the rules is that you are performing an action on your network using the concept of “Source” and “Destination”. Another words, let’s say you wanted to apply extra filtering to only one system and not the others. You would create a rule that would tell XG that requests coming from (source) IP xxx.xxx.xxx.xxx and going to the WAN (destination) will use this rule, while the others would be using the default rule. Or if you need a port forward for a controller or camera, you would create a rule that took a port request from the “WAN” (source), and sent it to a “LAN” computer with IP xxx.xxx.xxx.xxx (destination). Again it sounds pretty simple and it is after you get used to it, but at first the terminology requires some getting used to.
Rules Overview
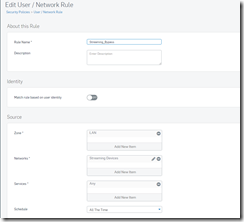
Before we get into some examples, it helps if we understand a bit about how XG treats things. “Most” of the day to day things that we want to do start from two basic types of templates, a network/user rule, or a business application rule. Below is an overview of the terminology which at first can be confusing. These terms are not on every template so you will not see all of these on a given rule, but the meaning is same throughout the software whenever the term is used. I have also attached samples of some rules I created to help you better understand.
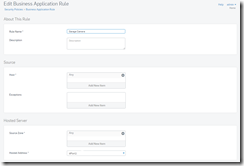
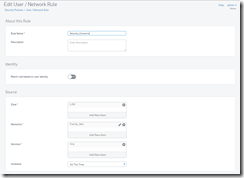
About This Rule
Rule Name: This is where you want to name the rule with something meaningful
Description: Optional description of the rule that might help you remember in the future why your created the rule.
Identity
Match rule based on user identity: In my application this is always set to “OFF”. (If you want to use this you will have to setup users and logons to allow this to be used.)
Source
Host: A specific device, port, or network where the rule originates from. In an average port forwarding rule this would be left at “Any”.
Zone: Here you select the rule such as WAN, LAN etc. For example, if I were creating a port forwarding rule, WAN would be my source most of the time you are forwarding “from (source)” to your destination.
Networks: This is typically a way to narrow the source and can be a specific network such as VPN, or can be left to “Any”
Services: Typically left to “ANY”
Schedule: The default is “All the time”. You can create custom schedules if you need. An example would be creating a rule that allows internet access to an access point or system, and then want to shut it down at a certain time.
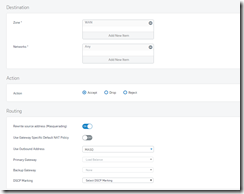
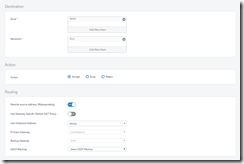
Destination
Zone: Same as above but the opposite end of the rule. Using the same example as above, if you were port forwarding a camera, the source would be WAN, but the Destination Zone would LAN as you are going to something on your network.
Source Zone: Usually set to “Any” unless you have multiple servers
Hosted Address: Typically set to the WAN port #2 in a port forward rule but other rules may be different.
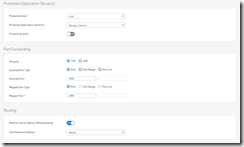
Protected Application Server(s):
Protected Zone: Usually set to LAN on a port forwarding rule.
Protected Application Server(s): In port forward this would be the “device” that you are forwarding the port to. For example, the living room camera.
Routing
Rewrite Source Address (Masquerading): This is typically set to on for most things
Use Outbound Address: Mostly set to MASQ
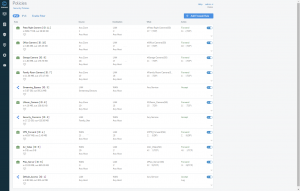
Once you have completed your first rule you should test it carefully. Then create each rule one at a time and test it after each time. As the default rule should have been created during the wizard (you will probably have to go in and add some web filtering and application blocking later) you have to determine what you want to accomplish with the rest of the rules. In my case this is the process I used.
- Created a “Port Forward” rule for each camera as I have my camera on different ports (Presently 6 cameras)
- Created a “Port Forward” rule for my Plex Server and Air Video Server.
- Created a strict filter for the secondary network that contains blocking P2P, torrent sites, remote access sites, spam sites, and hacking sites.
- As I have two separate networks, I created a rule that allows me to access certain resources from my network to secondary network as this is blocked by default.
- I allowed certain systems on the secondary network to access the NAS unit on the primary network and block the rest.
- Created the rule that bypasses the Xbox, Roku, and Apple TV from the filtering to address the video streaming issue.
Don’t go rule crazy until you have had a chance to make sure there are no side effects from the filters. Remember the rules are applied from top to bottom so make sure you do not have a wide open rule before a rule that blocks access.
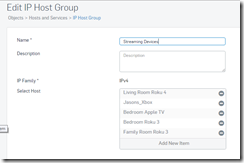
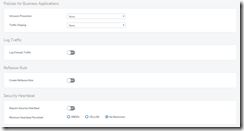
Rule #1
This rule was created to bypass the the XBox, Roku, and Apple TV’s from the web filtering.
This the IP Group that is called out in the “NETWORKS” section. You can edit the group without having to change the rule so I can add or remove devices easily.
Rule #2
This rule is used to port forward my garage camera from the WAN to a specific IP address and port so that I can access the camera from the road.
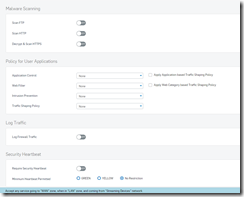
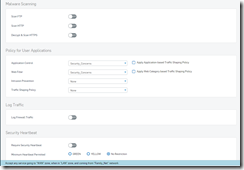
Rule #3 (Heavy filtering on secondary network)
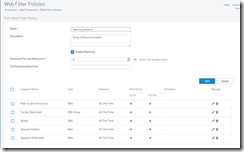
Web Filter policy that is called out in the “Policy for User Applications” section of the rule
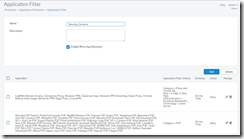
This is the “Application Filter called out in the same section of the rule. Looks complicated but is actually very easy. All you have to do when you add is to select categories.
Issues
This is an extremely powerful tool and for most it will more than you will ever need. This product is going to continue to be updated and get better over time, but like everything it has some flaws. For starters there is the video streaming issue. Not a huge deal if all you have is Roku’s and Xbox in your house, however if you have phones or tablets and need them to play Netflix, there may be an issue. To enable streaming on Android and IOS, you will have to bypass filtering, scanning, and application blocks for those devices which means you have about the same protection as an off the shelf router for those particular devices. For tablets and phones it may or may not be an issue depending on whether or not you have kids. If you have kids or others in the house that are not careful, you may have to add a dedicated Wi-Fi access point that has filtering in it so that you can control any kids that you may have in the house. Either way there is a solution as long as you know you will have to do something. The other issue I ran into was SSL VPN. I tried and tried to get that to work and never could. Fortunately I ended up using OpenVPN on my QNAP which turned out to work very easily and was considerably better than the built in one in Untangle. Lastly, was the learning curve. Depending on your experience level, figuring out the firewall stuff can take some time. Add to that the object based approach they are using on XG and you will have to experiment a bit before getting comfortable.
Summary and Results
To be honest when I started experimenting with Sophos I almost threw in the towel and gave up mostly because of the VPN. It simply does things differently than what I am used to and the logic simply escaped me at first. Sometimes having to unlearn something first is a challenge. But in the interest of possibly saving $54 a month, I thought I would stick it out. Besides, the prospect of being defeated by software was more than I could bear. In the end, I am glad I did as overall I am very very happy with the results. I feel like there is still much to learn but I have reached a comfort level that allows me to at least establish a good level of security with minimal side effects. I worked through my biggest concerns such as port forwarding and most of all the VPN. I rely heavily on my VPN connection for Remote Desktop, access to my files at home, and for internet tunneling, and once I was able to figure those issues out I felt comfortable enough to deploy in my home environment. Given that it is free for home use, full featured, very powerful, and no built in IP limits, it is worth investing some time on it if you care about security and know that this product will continue to get better. Of course when you travel this route you learn something in the process. If you are like me and not a network admin, it may take a bit longer to learn but eventfully you will get the payoff and have a secure and powerful network. As a matter of fact, I am very impressed with this and in the first week of deployment it has blocked 3 times the amount of items that Untangle ever did despite being a paid app. After the first few days, I immediately canceled my untangle subscription and if truth be told, I can never go back to Untangle after seeing the power that is in XG. I never used the UTM product so I cannot compare but I did run Untangle, pfSense, and a bunch of conventional routers and I honestly say that this much better. Despite a couple of flaws, I really like this product and I am sticking with it.
Note: I will be posting additional posts on Web Filtering, Country Filtering, Dynamic DNS, and other features as time permits so keep checking for updates.


[…] my first write up on the Sophos XG Firewall, I covered my basic network setup and the configuration that I used. Now that I have had a chance to learn it better and do a bit of experimenting, I want […]
[…] https://thedocsworld.net/sophos-xg-firewall-1-the-basics/ […]