As far back as I can remember, I have disliked iTunes for the PC. Partially because it is a single PC solution, partially because I do not like the rigidity of the architecture, and mostly because it just performs badly on the PC. Thanks to “TimeKills” from our forums, I was informed of a post from Andrew Edney at usinghomeserver.com and had a chance to try a product that changed the way I use my server, and most of all, helped me cope with some of the hassles of using iTunes. It bridged the gap between, WHS, iTunes, Home Sharing, and some of the cool features available for the IOS platform such as remote control. As it turns out, these two very unlike platforms can now co-exist and not only work, but actually complement each other.
[ilink url=”http://usingwindowshomeserver.com/2012/01/29/whs-add-in-update-ihomeserver-for-itunes-v2/”]Post from usingwindowshomeserver[/ilink]
[ilink url=”http://www.bizmodeller.com/iHomeServer_for_iTunes.aspx#”]Visittheir site for a summary of features and additional information:[/ilink]
Defining my problem
For starters it is important to understand why I was excited by this product. Although I have always had my media files on my WHS, it was never really easy to get iTunes configured to default to the server. Of course adding files as well as managing metadata meant going into the clunky and rather slow interface of iTunes on the PC. Add to that the fact you have to leave it running on your PC to share the files across your network, and you end up with an aggravating user experience. Enter iHomeserver into the equation. This product helps bridge the gap between iTunes and Windows Home Server in a couple of ways. In addition, if you do not want to use your WHS, then there are Windows 7, Server 2008, and Server 2003 versions of the software. I will skip over the basic setup and installations as that is already well covered on various sites, and instead cover my particular use case. I installed and tested both the WHS 2011 and Windows 7 as potential options for my particular needs.
First Step
When I first set this up, I did it in a VM so I could test it before moving it to my production server. The goal for this project was to have iTunes functionality on my server since it is on all the time, and to be able to add files to the library from any location/computer without having to go to one specific computer and log into iTunes.
At first when I set this up, I had some issues with getting everything to work. Not because of the software, but because of my rather convoluted iTunes setup. As I did not quite have a complete grasp of how to best implement this, I sent a letter to tech support for advice on the best approach. Ed, the developer of the application over at bizmodeller.com responded almost immediately, and after a couple of questions being answered, as well as following his directions I was able to get it going. The main issue that I came across was that the installation setup almost assumes that you are starting from scratch. It does not assume you have a ton of playlists and things already created like I did. So in a nut shell, the first challenge is to port your iTunes setup to your server or other computer first before attempting to install iHomeserver. Those of you who have messed with moving iTunes around before know that this can be painful but can be done. There are various tutorials online on how to this but in brief, here is what I ended up doing.
Since my existing computer had its default locations moved from a local machine “C:\Users\XXXX\Music” and remapped to \\WHS\Music which is on my server, it was fairly easy for me to go directly into the server and remap the user default locations (ie: Administrator) to the same directory since it was already on the server. In my case, my media and iTunes library is on my RAID partition so I mapped the server properties from “C:\Users\Administrator\Music” to “E:\Music”. Once I did that and installed iTunes on my server, it opened and everything was as I left it, only on the server not the client computer. Once you have iTunes running correctly and all your files and data is intact, installing the iHomeserver is a breeze. Remember that the key is to get iTunes running FIRST. The iHomeserver install will not fix problems if your iTunes is not functioning correctly. In retrospect it was fairly easy however I struggled for a couple of hours and hosed my iTunes library a couple of times before figuring out how to do this correctly.
Issues and problems
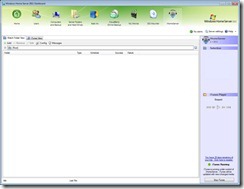
Nothing of course is perfect. The main issue I ran into in my particular situation is iTunes itself. As for the iHomeserver software my biggest complaint is that if I want to manage apps at the iTunes level (not the device) I have to RDP into my server, open the dashboard, pause the server, and then launch iTunes and do what I need to do. When I was finished I had to close iTunes, then un-pause the server. Not a big deal in the grander scheme of things but not ideal. I communicated with the developer and asked about the apps and he explained that it was not because of his software, but rather because Apple did not release any API’s to work with apps, only music and movies. He also mentioned that a great number of people now want to sync via WiFi which minimizes the need to log in as much as it used to. In my few communications with him, I mentioned a feature for force updating of podcasts (something that iTunes does not do by itself) and the feature was immediately added in the most recent release. I hope to see this automated at some point as you still need to go into your WHS dashboard to refresh your podcasts. Again not a huge deal but it is something you will have to do. Overall I did not have any major issues related to iHomeserver itself and what I was impressed by was the responsiveness of the developer and his willingness to support the product.
Results and benefits
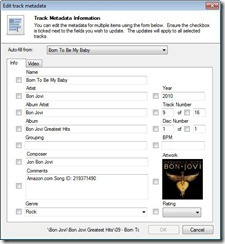
At first it may not be obvious but the flexibility it afforded me was exactly what I needed. It provided a service based iTunes that ran well on my WHS 2011 providing me with my content 24/7, and most importantly it gave me a way to attach to multiple folders that I could copy content to and have it update my iTunes for me. This is a great feature for households that have several users and want to maintain one library, yet want to have different users add to the collection. By monitoring a folder, I can simply copy an MP4 or MP3 to that folder without ever going into iTunes and have it update my library. Having iTunes library running all the time also made it easier to share through the “Home Sharing” feature of iTunes to any device that plays content from iTunes. In my case, I use a couple of Apple TV’s and this allowed me easier access to all the podcasts, music, and movies that are in my library. Throw in the slick remote control app from Apple and you have a complete package at least within this ecosystem.
Summary
In closing if you are in the iTunes ecosystem and running a Windows Home Server, you might look into this product to see if will benefit you as much as it did me. They have a 30 day free trial so there is little risk in trying it. I would also suggest that you email the developer with any suggestions or post them in the comments as he does listen to our input.


[…] can find the article here. […]
Hey Doc,
I have been trying iTunesServer on my newly rebuilt 2011 box. It’s going well but I have one question. I see how it can aggregate music from iTunes clients, but how or are the changes pushed back to clients that don’t have a particular song?
The idea is that you have IOS 5 using WiFi sync and the “automatic downloads” in iTunes preference set to auto download Music, apps, and books (Stop the iTunes server, open iTunes, go to “Edit”, “preferences” and click on store). Once content gets added by a client, the others will reiceve the content either autmatically or by using wifi sync. Ed the develper has been wonderful in helping as well as tweaking features and would suggest you forward him the same question to make sure of what I am telling you as he might have a better way. Not sure if I answered you question or not so here is his email: support@bizmodeller.com. Thanks for the comment and it helped.
[…] is pretty obvious from the amount of people that read my first write up on iHomeserver, that we are still looking for ways of not having to deal with iTunes. When I first started using […]
[…] is pretty obvious from the amount of people that read my first write up on iHomeserver, that we are still looking for ways of not having to deal with iTunes. When I first started using […]