Ever wish you had a dedicated machine you could use for testing software or had the ability to run dedicated tasks such as maybe a backup server or media server? Then creating a Virtual Machine with Hyper-V might be worth a look. There are many reasons you may want to run VM’s but one of the most useful features is to run test environments. The ability to test different S’s is a great use for a VM whether you want to teach yourself programing, play with SharePoint, or simply test a beta version of windows. There are also some more functional reasons to use VM’s such as running media streaming software such as Plex or iTunes, or things like home automation, or ip camera security recording. There are dozens of reasons but in reality, many of us need to use a VM at one time or another even if only temporarily for testing purposes. Since Hyper-V is included in Windows 8 Pro as an installable option, there is no cost or reason not to give it a try. I attempted to create a basic walk-through on how to install Hyper-V and create your first VM. I hope you find it helpful and enjoy creating your Virtual Environments.
Install
- Install the Hyper V role in Windows 8
- Go to “Control Panel
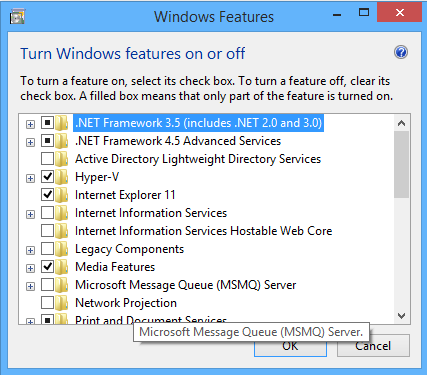
- Left click on “Turn Windows features on or off ” in “Programs and Features”
- Left click on “Hyper-V” in “Windows Features” and select “Hyper-V” and click OK
- Reboot when asked
-
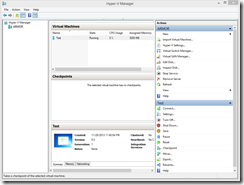
Using the global Search, type “Hyper-V” and select the Hyper-V Manager to launch it.
Step One – Modify some key Settings (Hyper-V)
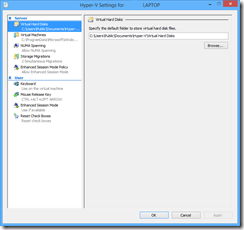
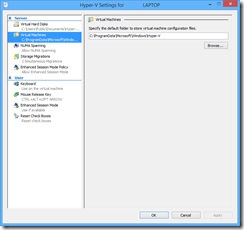
- Set the default location of your “Virtual Hard Drives”. This will become the default location going forward. This is especially important if you run your OS from an SSD.
- Set the default location of your “Virtual Machines”. Same reason as above.
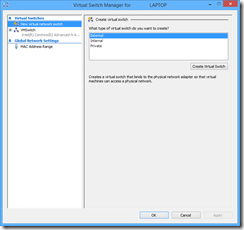
Step Two – Adding a Virtual Switch
- Next you need to create at least one Virtual Switch using your existing Network card or if you have more than one card, use one for the local machine and one for VM’s (this is highly recommended on Server Essentials but optional on Windows 8).
Step Three – Creating you first VM
- Before you start you should have a folder (if you do not already) that contains all the ISO files you will use to create your VM’s.
- Under “Actions” in the Hyper-V menu, click on New and select “New Virtual Machine” and click “Next”.
- Type in the name of your new VM.
- Select the Generation Type. Use “Generation 1” as the default for now.
- Type the amount of memory needed. This value is usually based on the minimums of the OS you are installing. If you are going to run this all the time you may want to allocate more for the best performance, or check off the to the dynamic setting which allocates memory as required. It is not quite as fast but allows for more flexibility.
- Click “Next” and select the “Virtual Switch” you created earlier. If you did not create one you can add it later.
- Click” Next” again and create a Virtual Hard Disk name and type in the size you want. Usually this the minimum size need by the OS or the size you would like to have and click “Next”. (remember you can easily increase the size later so start small).
- There are several options here but assuming you are creating your first VM, you will want to select the second option “Install an operating system from a bootable CD/DVD ROM”. Then select whether or not you are installing from a physical DVD or an ISO file. Most of the time you want to use the ISO file as it is faster and easier.
- Click “Browse” and select the .ISO file that you put into a folder (step 1) and click “OK”.
- When you are done, click “Finish” and you should be back at the Hyper V manager.
- Now that everything is installed, right click on your newly created VM from the Hyper-V manager and select “Start”. This is will fire up the VM and begin the install process of your VM. Follow the install prompts and complete the install.
Step Four – Accessing and controlling your VM’s
- There are different ways of accessing your Virtual Machines but want I usually use is remote desktop. Of course you can launch your Hyper-V manager and run them from there as you did during the install, however that is limiting and does not provide the same experience. Use the built in RDP app and make sure that you have enabled the remote access on each VM client and you should be good to go.

